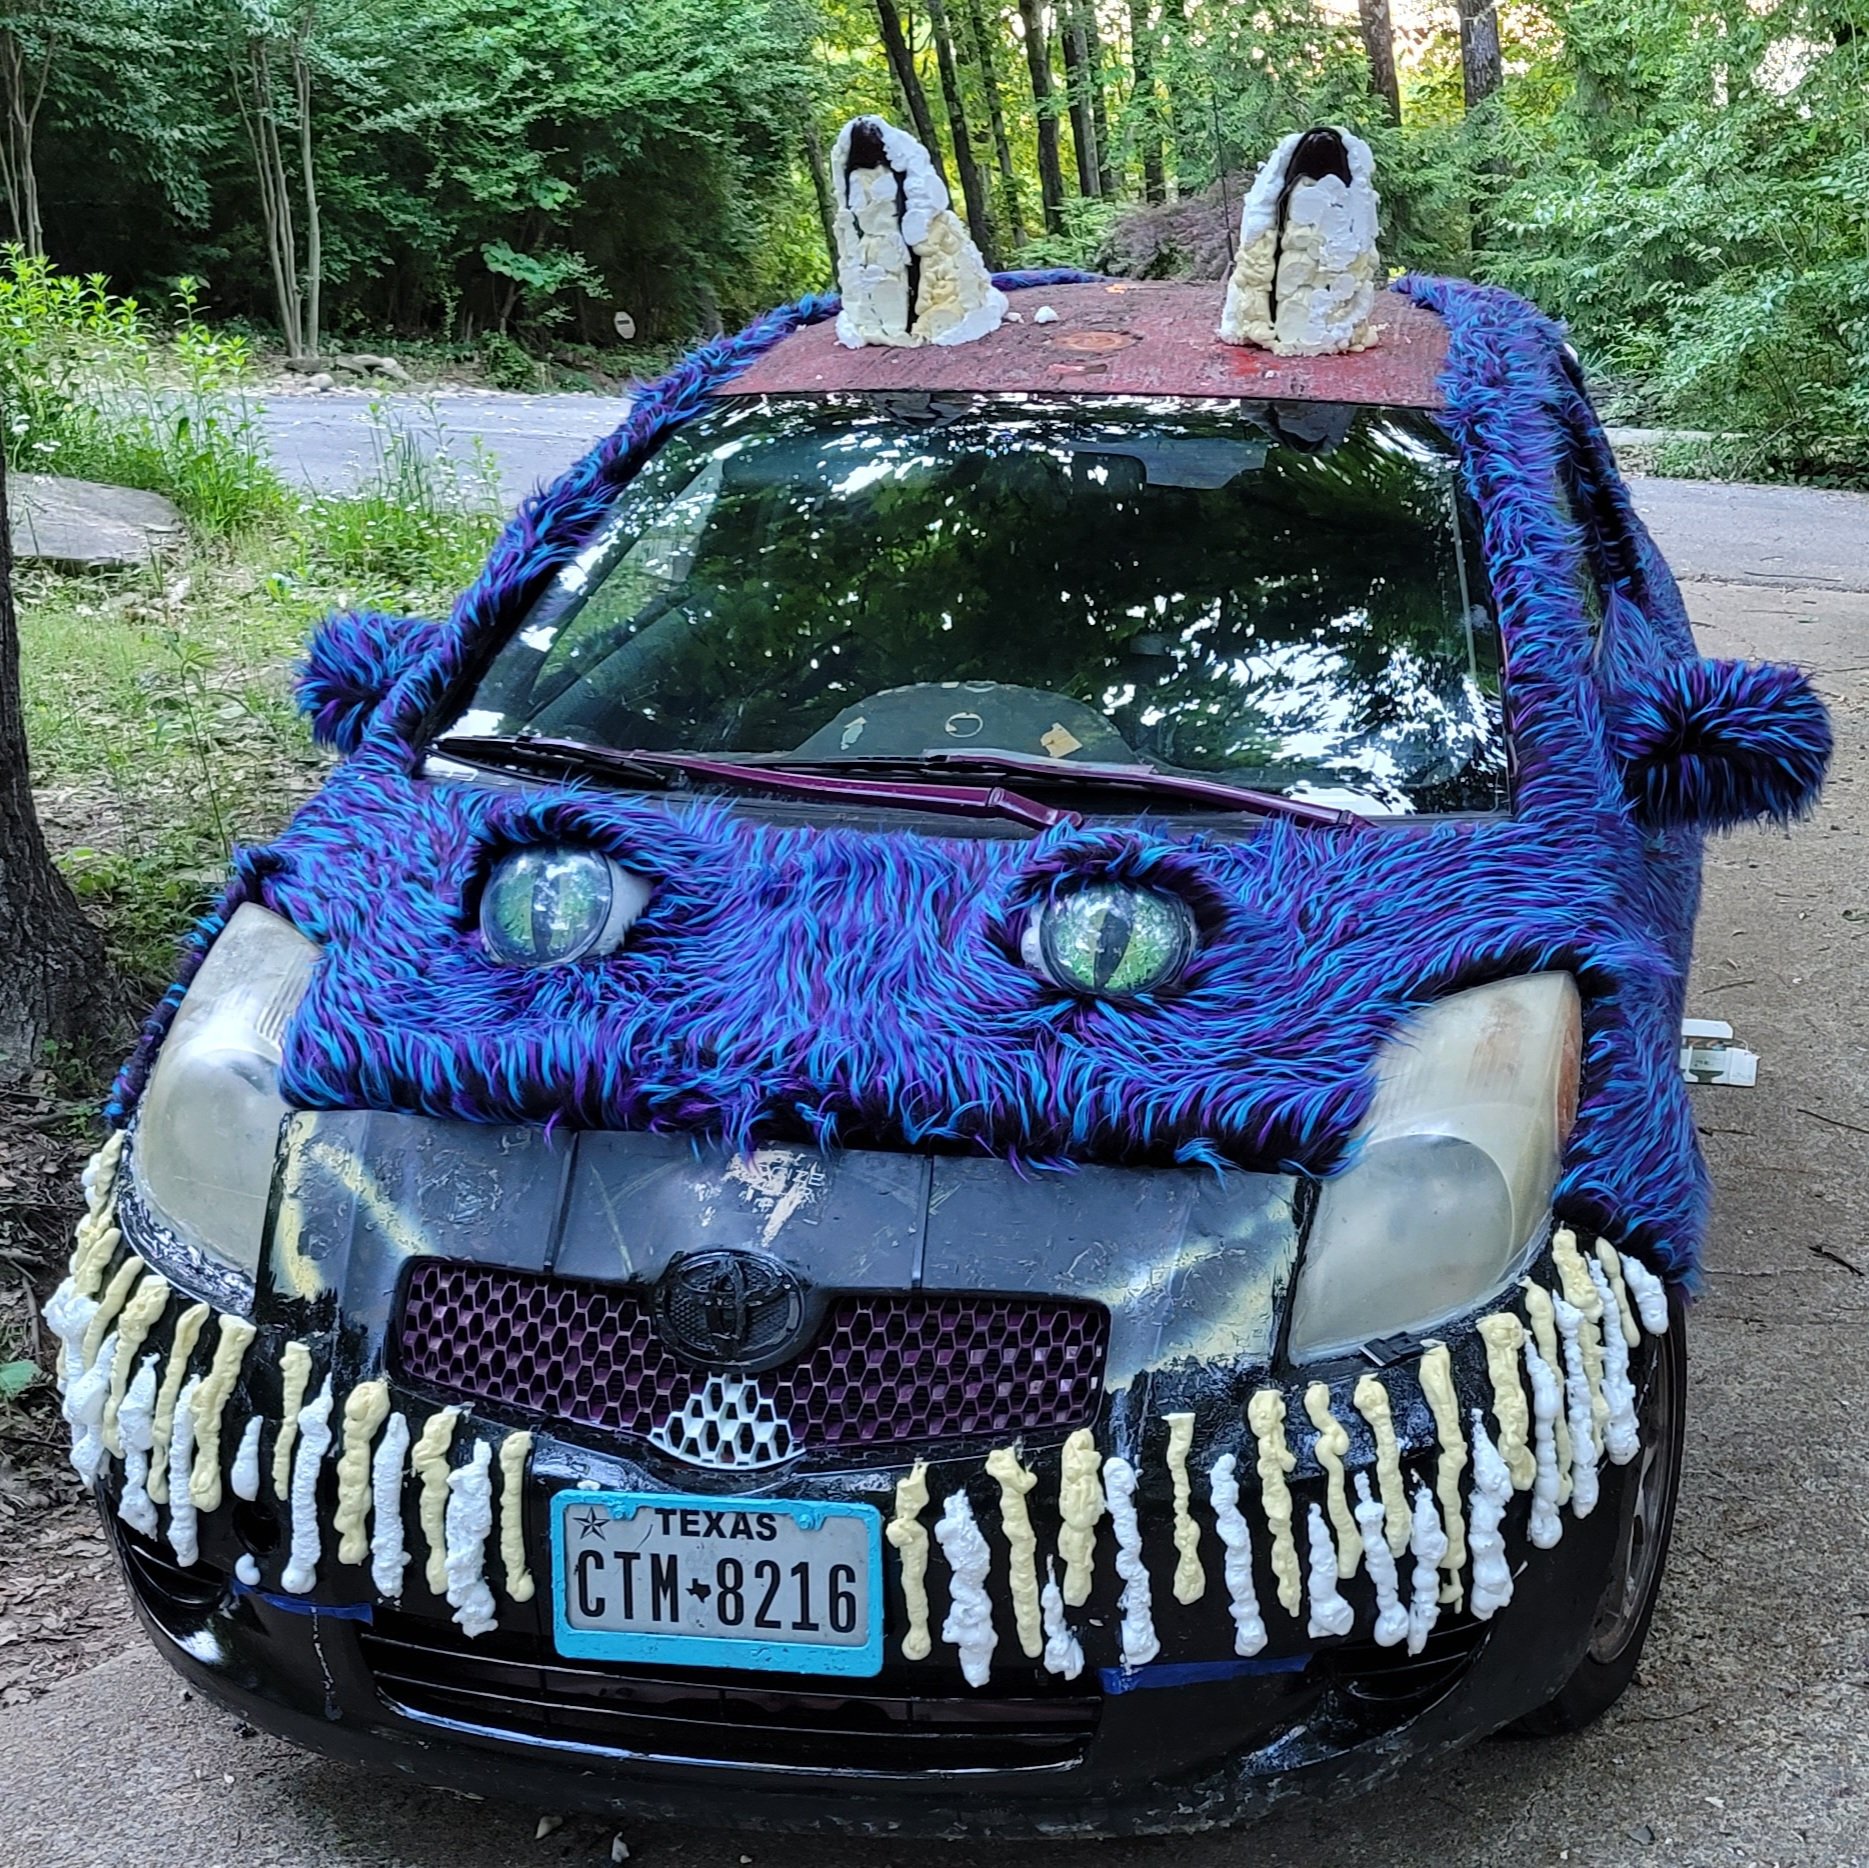
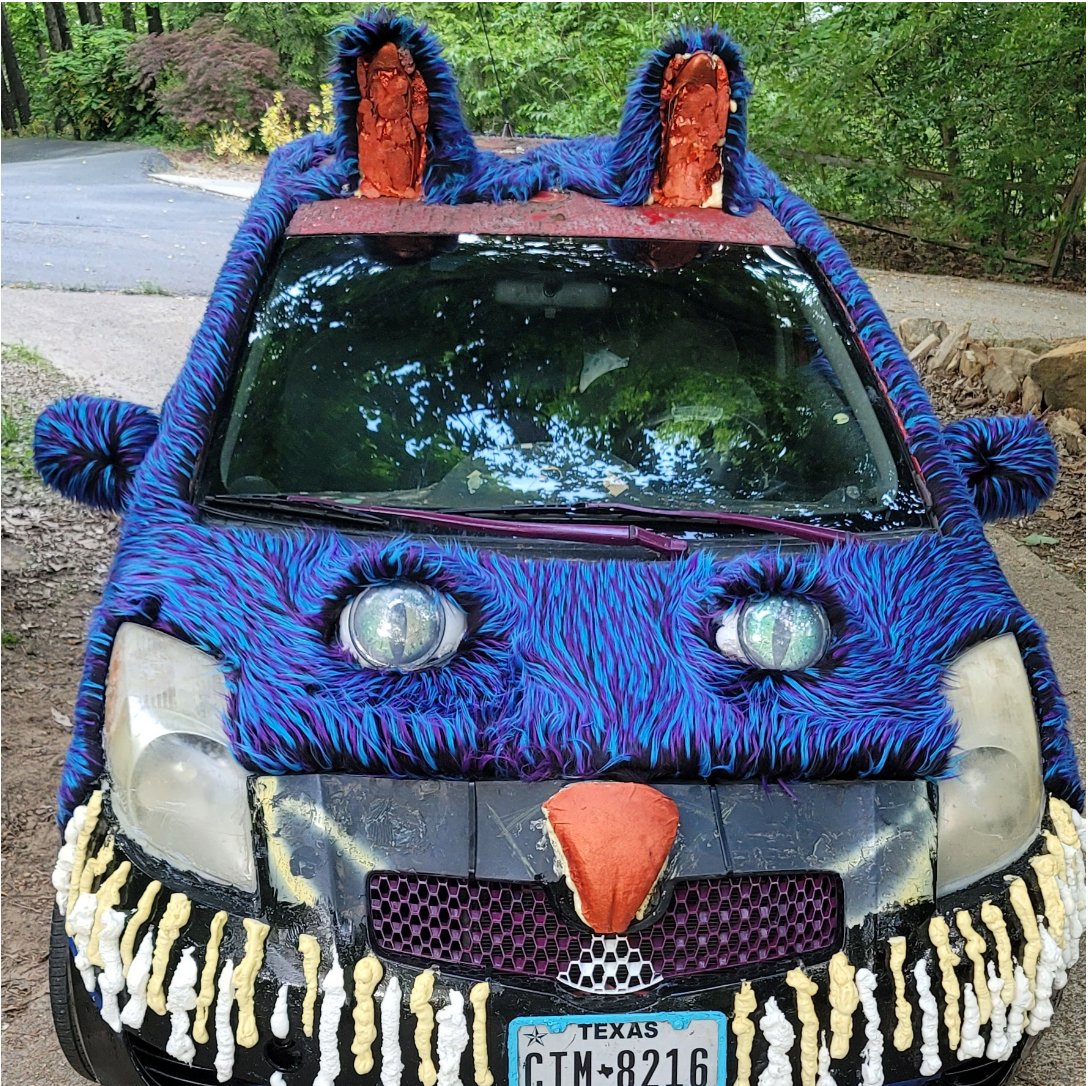
The Cheshire Cat: A Retrospective On Creation

Becky “Queen Becky” Morris, and her good friend Gina Hampen took a road trip to Chattanooga from their homes in Huston, Texas. They hit the road in April of 2022 with the single goal of creating a Cheshire cat inspired art car later named “Kat BaLue”. Take a look with us, and learn the process behind the creation of this creepy-cool piece of moving art!
The Start
“While on the road stopping at the convenience stores to fill up with gas, people would walk out of the store with the strangest faces.”

A Little Bit of Nonsense and Randy Blair
“The car started as a Little Bit of Nonsense by Randy Blair,” Becky ‘Queen Becky’ Morris remembers. “It was beautiful, covered with glass, mirrors and lights. During quarantine, with plenty of time on his hands, he began disassembling this fabulous car.” Becky continued, going on to recall the thick silicone covering left behind. “It was like picking at a Scab,” Becky commented, The car was covered with silicone, varying in layers of thickness from 1/2 inch, to 3 inches in density.

Scabby - Kat BaLue in its “Pupal Stage”
It was in many shapes and sizes, and once you started picking at the excess silicone, you couldn’t stop. The car was then dubbed Scabby, and the name would stick for the entirety of Becky’s car ride home. “This was such an ugly car, I got pulled over twice by the police. They probably thought I was a crack head with such a horrible scabby looking car.” People would stop and stare, according to Becky. “While on the road stopping at the convenience stores to fill up with gas, people would walk out of the store with the strangest faces. They did not know how to react to such a disaster of a car. No one would talk, only look disgusted or surprised. It was laughingly embarrassing.”
The Plan
Before Morris even started to travel in Scabby, she’d already planned what would become of the retired art car. First, Morris and her Cheshire co-creator Gina Hampen created a list. That list was:
Tape measure.
Several Sharpies.
Carpet knife with plenty of blades.
Chip brushes, lots, in several sizes, and little (paintbrush) brushes for all the edges.
A gallon (possibly a bit more) latex carpet glue.
A packet of clothes pins (the laundry kind).
Scissors.
A broom.
Screwdriver.
Strong magnets (auto parts has rare earth magnets, those are good).
Newspaper and masking tape.
A needle and strong thread to assemble the tail.
Pool noodle? for the tail.
They then worked together to source the materials that they’d need to create their car. Hampen would email Morris about this, saying: “Let me think on the eyes. Mouth of car is a funny shape (not smiley)….Could build/carve teeth of foam or maybe Bondo (roadproof). Depends upon whether you want sharp cat teeth or solid Disney teeth…” Hampen’s main points was that the mouth would be the most simple to figure out, as cats don't have lips—which would make building it into the design easy.

The Final Choice

Runner Up
What would be a bit more difficult, was deciding what fur the car was going to use. There were a few choices but ultimately, Morris and Hampen were able to narrow the choice down to a few choices (pictured left). When it came down to it, Morris was able to narrow it down to the first choice of fur. “The top is my favorite fur. It looks like the rug in my living room,” She said. After that, they needed to get into logistics.
“Quick figuring: about 5 yards, about $200 before shipping costs and this company is in California,” Hampen started. “Probably enough left over to make a nice fur coat.” Since it was getting shipped, and wasn’t near enough for either of them to drive to, they’d need to call and talk shipping costs.
Once they got their plans figured out, collected the things they needed from their list, they geared up and made their final plans. This time, it was about travel to Chattanooga TN—where they planned to put together their Cheshire Cat creation.
““I took off April 19-May 12. Will pick you up after work and head home. On Tues we’ll hit the road.””
The Process

Gina Hampen forming Chesire’s ears from a pair of old men’s dress shoes.

Hampen Working in front of The Creative Discovery Museum
After their journey to Chattanooga, the two started working on the truck at various workspaces—including the Creative Discovery Museum. The list also included Kate Warren’s (Executive Director of Art 120) house, and local makerspace, ChattLab, to name a few. Lots of creative problem solving went into the final design. Two challenges that arose were how to maker the ears and eyes. The ears needed a stable, ear-shaped, form to build on and the eyes needed to be waterproof.
Sketches and discussions ensued. Gina realized the ear shape resembled a men’s dress shoe which can not only can be acquired cheaply at a thrift store, but also has enough support to build on. The eyes were found online and the artists found plastic domes commonly used for crafts to make them waterproof and more dimensional. They started working on ‘Cheshire’ on April 24th, and finished on May 3rd, one day before We Make fully kicked off with school visits, artists, and events.
The Stages of Work-In-Progress

Life Lessons From The Cheshire Cat
A Closing Message
Be Proud of Who You Are
Like all members of Wonderland, the Cheshire Cat is mad, but unlike the others, he admits it with pride. The Cheshire cat was proud to be who he is. I think we can learn a lesson in that. We aren’t perfect. We are all a little off in one way or another. Instead of hiding our imperfections from society- be real and admit your shortcomings, fears, and problems. You might just find out you are not alone!
—PixieDustSavings
